
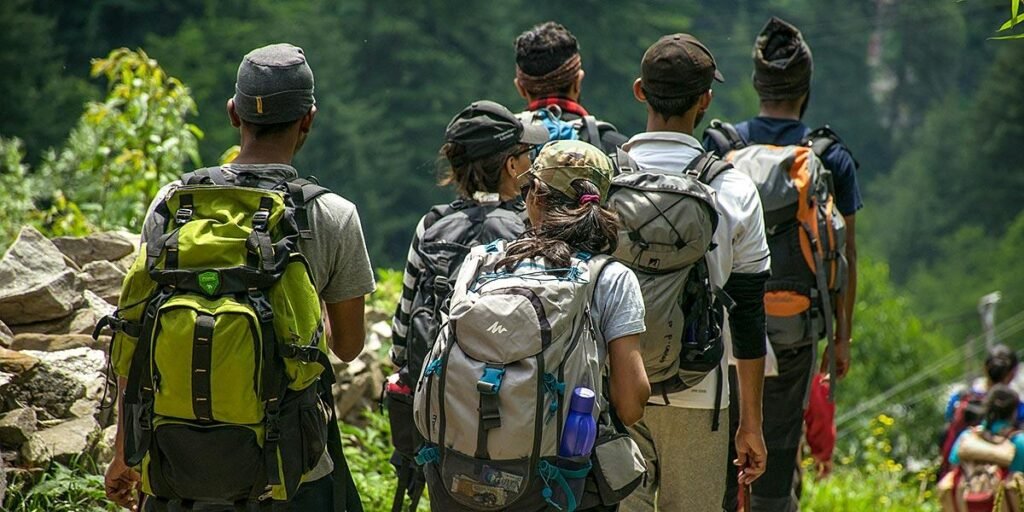
A sudden downpour can turn a pleasant afternoon hike into a miserable struggle, while a minor cut, a dead phone battery, or a wrong turn can transform an ordinary outdoor adventure into a serious challenge. Most people head into the wilderness expecting their plans to unfold as intended, but the outdoors rarely follows a predictable schedule. Having a few dependable supplies within reach can make the difference between handling an unexpected problem calmly and watching a manageable situation spiral out of control.
The good news is that preparing for emergencies does not require expensive equipment, a backpack filled with military-style gadgets, or a shopping trip to a specialist outdoor store. I have found that a practical survival kit is built around a handful of essential needs: clean water, shelter, warmth, first aid, navigation, and communication. With a little planning and a willingness to prioritize useful equipment over impressive-looking accessories, you can assemble a reliable kit without putting unnecessary pressure on your budget.
Start With the Essentials, Not the Shopping Cart
My first rule when assembling an outdoor survival kit is simple: identify the problems you might realistically encounter before spending money on equipment. A day hike through a familiar forest presents different challenges from a weekend camping trip in cold mountains or an extended journey through a hot, remote landscape. Your kit should reflect the terrain, weather, length of your trip, distance from help, and the number of people relying on you.
This approach also prevents one of the most common mistakes beginners make: buying gear because it looks useful rather than because it serves a clear purpose. A compact flashlight that reliably illuminates a trail is more valuable than an expensive tactical accessory that rarely leaves your backpack. Similarly, a simple water container and a dependable treatment method deserve priority over novelty tools with a dozen functions that may never be needed.
I like to divide survival equipment into categories and assign a budget to each one. Water, first aid, shelter, warmth, navigation, and signaling come first, followed by food, tools, and convenience items. Once those basic needs are covered, you can gradually improve the kit instead of trying to purchase everything at once.
Build a Water System That You Can Trust
Water should be near the top of any survival kit because dehydration can quickly affect concentration, physical performance, and decision-making. The amount you need depends on the climate, activity level, individual needs, and availability of safe water sources. For an ordinary outing, I carry enough drinking water for the planned activity and allow extra capacity for delays rather than assuming that a stream or pond will provide a safe refill.
A reusable water bottle or durable water container is one of the easiest places to save money. You do not need an expensive branded bottle to transport water reliably, although the container should be clean, leakproof, and suitable for drinking water. A second container can be useful because it allows you to collect water separately before treating it, reducing the chance of mixing untreated water with water that is ready to drink.
Water treatment is where I would rather spend a little more on reliability than cut corners. Portable filters, water purification tablets, and other established treatment methods can help make water safer, but they do not all work against the same hazards. Some filters remove many parasites and bacteria but do not reliably remove viruses, while chemical treatments vary in their effectiveness and the time required to work. Follow the manufacturer’s instructions, check which organisms the method addresses, and remember that clear-looking water is not necessarily safe. If the water may contain fuel, pesticides, industrial chemicals, or other toxic contaminants, ordinary portable filters and disinfection tablets may not make it safe.
Put Together a First-Aid Kit You Can Actually Use
A first-aid kit does not have to be large to be useful, but it should contain supplies suited to the activities you plan to undertake. For a basic outdoor kit, I would include adhesive bandages in several sizes, sterile gauze, medical tape, antiseptic wipes, blister dressings, disposable gloves, and a small pair of tweezers. These supplies can help you manage common problems such as minor cuts, scrapes, and hot spots on your feet before they become more serious.
You should also consider your personal needs when deciding what belongs in the kit. Anyone who regularly uses prescribed medication should plan how to carry an appropriate supply, while people with known allergies may need their prescribed emergency medication. Include any personal medical information that could help someone assist you if you become unable to explain your needs. Check expiration dates periodically and replace items that have been used, damaged, or exposed to unsuitable conditions.
There is little value in carrying medical equipment you cannot use correctly. Before heading into remote areas, consider taking a recognized first-aid course that covers outdoor emergencies, wound care, burns, and how to recognize conditions requiring professional help. A compact kit paired with basic knowledge is often more useful than a large collection of unfamiliar products. For serious bleeding, breathing difficulties, suspected spinal injuries, or other life-threatening emergencies, seek emergency assistance as soon as possible and follow the training you have received.
Find Affordable Shelter and Weather Protection
Exposure can become a major problem when temperatures fall, rain persists, or a planned day outdoors unexpectedly turns into an overnight stay. A lightweight emergency blanket is an inexpensive addition to many kits and takes up very little space. It can help reduce heat loss when used appropriately, although it is not a replacement for proper insulation, a dry sleeping layer, or suitable shelter in prolonged cold or severe weather.
A simple waterproof layer can provide another useful line of defense. Depending on your environment, this might be a compact rain jacket, a lightweight poncho, or a suitable tarp that can be pitched with cordage. A tarp has several advantages because it can provide cover from rain and sun, protect equipment from wet ground, and create a basic shelter when you have the knowledge and materials to set it up safely. Check that the material is strong enough for its intended use and that you know how to secure it before relying on it outdoors.
I would prioritize dependable protection over specialized camping accessories when money is tight. A budget rain jacket that fits properly and keeps you reasonably dry can be more useful than a premium accessory that solves a much narrower problem. Keep your dry clothing and emergency insulation inside a waterproof bag or liner, since even excellent equipment becomes less effective if it is soaked before you need it.
Carry a Reliable Way to Make Fire
Fire can provide warmth, help with cooking, and support morale in some outdoor emergencies, but it should never be treated as a guaranteed solution. Wet conditions, wind, poor fuel, and local restrictions can make it difficult or unsafe to start a fire. Your survival kit should therefore include fire-starting equipment without depending on fire as your only source of warmth or a method for making water safe.
For a budget-friendly option, a reliable lighter is a practical starting point. I would carry a backup ignition method, such as waterproof matches stored in a sealed container, along with a small amount of appropriate tinder. Store these items separately so that one wet pocket or damaged container does not ruin every ignition option. Test your equipment at home in safe conditions and learn how to use it before taking it into the wilderness.
Fire safety matters just as much as fire-starting ability. Check local rules, wildfire warnings, and campsite restrictions before lighting anything, and never start a fire when conditions make it unsafe. Use established fire areas where permitted, keep the fire attended, and extinguish it completely before leaving. In areas with high fire danger, a stove may also be restricted, so prepare for the possibility that you will need to manage an emergency without lighting a flame.
Choose Tools That Earn Their Place
A small, dependable cutting tool can help with ordinary outdoor tasks such as preparing cordage, opening packaging, or cutting material when needed. It does not need to be expensive, and it should be appropriate for the activities you expect to undertake. A simple pocketknife or compact multitool from a reputable manufacturer may be sufficient for many recreational trips, provided you know how to handle it safely and maintain it.
A modest repair kit can be just as useful as a blade. A few metres of strong cord, several cable ties, duct tape wrapped around a small card, and a couple of safety pins can help address minor equipment problems. These items can secure loose gear, patch small tears temporarily, or help organize supplies, although they are not substitutes for proper repairs when equipment failure could put you at risk.
I avoid filling a kit with tools simply because they promise to do everything. A multitool may combine pliers, a blade, scissors, and screwdrivers, but some inexpensive versions are poorly made or uncomfortable to use. Compare the quality of the functions you actually need rather than counting how many features appear on the packaging. A few sturdy, familiar tools will usually earn their space more readily than a bulky gadget with a long list of rarely used functions.
Make Navigation a Priority
Getting lost is not only a problem for inexperienced hikers. Fatigue, changing weather, fading daylight, trail intersections, and an inaccurate assumption about your position can affect anyone. Before leaving, I make a point of checking the planned route, identifying major landmarks, and telling someone where I intend to go and when I expect to return.
A basic compass and a suitable paper map can provide a low-cost backup to electronic navigation. However, carrying a compass is not enough by itself; you need to know how to orient a map, identify your position, and follow a bearing. A map should also cover the actual area you intend to visit, rather than being a general map that lacks useful trail details. Practice these skills in familiar surroundings before depending on them in a remote location.
Your phone can still be an important navigation tool, particularly when you download maps for offline use before leaving home. Keep in mind that batteries can drain in cold weather, signal may be unavailable, and electronic devices can be damaged. Reduce unnecessary battery use, carry a charged power bank if appropriate, and protect your phone from moisture. If you become disoriented, stop and assess your situation rather than walking randomly in the hope of finding a familiar landmark.
Pack Light and Affordable Lighting
A dependable light source is essential whenever a trip might continue after sunset. Even if you expect to return well before dark, an injury, a delayed route, or an unexpected change in conditions can leave you moving around in low light. A basic headlamp is often worth the modest extra cost because it leaves both hands free for walking, setting up shelter, or attending to equipment.
Compare the light’s battery life, ease of operation, durability, and power source rather than focusing only on its advertised brightness. A very bright light that drains its batteries quickly may be less useful for a prolonged emergency than a simpler model that provides steady illumination for longer. If possible, choose a headlamp with a straightforward interface and carry spare batteries or a suitable charging option. Check the manufacturer’s recommendations so you know which batteries the device needs.
Keep your light somewhere you can reach without unpacking the entire bag. I prefer placing it in a consistent pocket alongside other small emergency items, rather than moving it between bags after each trip. Test the light before leaving and check it periodically during storage. A light that has been sitting unused for months may have depleted batteries, corroded contacts, or a switch that no longer works as expected.
Include Emergency Signaling and Communication
In an emergency, being able to attract attention can be just as important as carrying equipment for shelter or warmth. A whistle is inexpensive, lightweight, and generally easier to use repeatedly than shouting. Keep it attached to your pack or another accessible location so it remains available if you are tired, separated from your bag, or struggling to move.
A small mirror or another appropriate visual signaling device may help attract attention in suitable daylight conditions. A bright-colored cloth can also make you more visible to rescuers, particularly in landscapes where natural colors blend together. These items are not guaranteed to be noticed, so use them alongside a planned communication strategy rather than assuming that one signal will solve every situation.
Before setting out, make sure someone knows your route, expected return time, and what to do if you fail to check in. In remote areas, a personal locator beacon or satellite messenger may be worth considering, especially if you travel alone or frequently visit places without mobile coverage. These devices cost more than basic supplies, so they may be a later purchase for casual outings, but reliable emergency communication can justify the expense when the consequences of being unreachable are serious.
Pack Food That Provides Useful Energy
Food is another area where it is easy to overspend. Many outdoor retailers sell specialized emergency bars and freeze-dried meals, but familiar supermarket foods can serve just as well for many short trips. Nuts, trail mix, dried fruit, crackers, and other shelf-stable snacks can provide convenient energy without requiring elaborate preparation.
Choose food that suits the duration and intensity of your activity, and account for the weather and storage conditions. Foods that melt, spoil quickly, or become unpleasant to eat in heat may not be ideal for a kit that stays packed for months. Check packaging dates, protect food from moisture, and replace supplies as needed. If you have dietary restrictions or allergies, make sure the emergency food you carry is appropriate for you.
I would treat emergency food as a backup rather than a reason to underestimate normal meal planning. A few snacks will not compensate for inadequate water, insufficient clothing, or a poorly planned route. For longer journeys, calculate food requirements realistically and carry enough for the planned trip, with an appropriate reserve for delays. In an unexpected situation, conserve energy and avoid taking unnecessary risks simply to reach your next meal.
Use Your Backpack Space Wisely
A survival kit works best when its contents are organized, protected, and easy to locate. You do not need a specialized tactical backpack to achieve this. A sturdy daypack you already own may be perfectly adequate, provided it fits comfortably, can carry the intended load, and has no damaged seams, zippers, or straps.
Small waterproof pouches or reusable zip-top bags can help separate medical supplies, fire-starting materials, electronics, and other items that need protection from moisture. Group equipment by purpose so you can find what you need without emptying the entire pack onto the ground. Labeling pouches can help, particularly if other people might need to use your kit in an emergency. Avoid packing everything into one large compartment where small items disappear beneath heavier equipment.
Weight distribution also deserves attention. Keep frequently needed items within easy reach, secure heavy objects so they do not shift while walking, and avoid carrying unnecessary duplicates. Your kit should be light enough that you can move safely with it over the terrain you expect to encounter. Before a longer outing, walk with the packed bag and adjust anything that causes discomfort or makes the load unstable.
Spend Your Money in the Right Order
Building an affordable kit becomes easier when you separate essential equipment from optional upgrades. I would first make sure that I have adequate water capacity and treatment, first-aid supplies, weather protection, a light source, navigation backups, and basic emergency signaling. Once these needs are addressed, I would gradually add repair materials, extra food, improved insulation, and specialized equipment suited to the trips I take most often.
Prices vary by country, retailer, and product quality, so it is better to compare local prices than rely on a fixed shopping list from an overseas website. As a rough planning exercise, you might set aside the equivalent of $10–$20 for basic lighting and signaling, $10–$25 for first-aid supplies, $10–$30 for water storage and treatment, and $15–$40 for simple weather protection or other basic gear. These are illustrative budget ranges rather than guaranteed prices, and the total will depend on what you already own and which items need to be purchased.
There are several ways to reduce costs without compromising the kit’s purpose. Use durable household items when they are genuinely suitable, borrow specialized equipment before buying it, and look for sales on reputable products. Secondhand gear can be useful for some noncritical items, but inspect it carefully and avoid relying on damaged or untested equipment for safety-critical functions. I would rather build the kit over several pay periods than buy everything at once and end up with unreliable gear.
Know What You Should Never Cheap Out On
Budget shopping has limits, especially when a product is responsible for protecting you from a serious hazard. Water treatment is one example because the wrong method can leave dangerous organisms in your drinking water. A questionable filter with unclear specifications may appear to save money, but it is a poor investment if it does not address the risks in your environment. Check credible product specifications and follow the manufacturer’s maintenance and replacement instructions.
The same caution applies to equipment that protects you from severe weather. A thin blanket cannot replace a suitable sleeping system in freezing conditions, and a lightweight rain layer may not be sufficient for prolonged exposure to heavy rain and wind. Match your equipment to the conditions rather than assuming that any product labeled for outdoor use will provide adequate protection. If your planned route involves remote terrain, extreme temperatures, or serious weather exposure, you may need to invest in better equipment or choose a safer trip.
I also avoid cutting corners with items that have hidden safety requirements. Old medications, damaged batteries, unreliable headlamps, and worn-out straps can all create problems when you depend on them. Check equipment before each trip, replace anything that no longer works as intended, and learn the limitations of each item. A sensible budget should reduce waste, not encourage you to carry gear you do not trust.
Test Your Kit Before You Need It
One of the cheapest ways to improve a survival kit is to practice using it. A product may look straightforward in a shop but prove awkward when you are tired, wearing gloves, or working in poor light. Set up your tarp in the backyard or at a permitted campsite, test your headlamp, organize your first-aid supplies, and practice using your map and compass on a familiar route.
A short local outing can reveal what your kit is missing without exposing you to unnecessary risks. You might discover that a water bottle leaks when placed sideways, a pouch is difficult to open, or the pack becomes uncomfortable after an hour of walking. Make a note of these issues and fix them before undertaking a longer trip. Practice should take place in controlled conditions, with appropriate supervision when necessary, rather than by deliberately putting yourself in a dangerous situation.
After each outing, review what you actually used and what remained unnecessary. Clean and dry equipment before storing it, restock consumed supplies, check batteries, and replace damaged packaging. This routine helps prevent the gradual decline that can leave a once-reliable kit unprepared after months in a cupboard. It also makes future spending more efficient because you can identify the improvements that will genuinely benefit your next trip.
Adapt the Kit to Your Environment
No single collection of equipment is perfect for every landscape. A hot, dry environment calls for particular attention to water, sun protection, and heat management, while a cool, wet forest makes dry insulation and reliable rain protection especially important. Mountain routes can introduce rapid weather changes, exposed terrain, and navigation challenges, so equipment suitable for a short lowland walk may be inadequate at higher elevations.
Consider the hazards that are most likely on the trips you actually take. In areas with significant insect activity, appropriate repellent and protective clothing may be useful additions. Where snakes or other wildlife are present, learn how to avoid encounters and respond safely rather than buying gadgets that promise unrealistic protection. If your route crosses remote areas, research local emergency services, access restrictions, and communication limitations before leaving.
Local knowledge is often one of the most valuable resources available, and it costs little to ask experienced hikers, guides, or park staff about conditions. Their advice can help you avoid spending money on gear that is unsuitable for the area or overlooking something important. Use reliable local guidance to refine your kit, while remembering that conditions can change and no amount of preparation eliminates every risk.
A Simple Final Checklist Before You Leave
Before heading outdoors, I run through a short checklist to make sure the important items are present and working. I confirm that I have enough drinking water, a dependable treatment method where needed, basic first aid, suitable clothing, shelter or weather protection, lighting, navigation tools, food, and a way to signal for help. I also check the forecast, confirm route details, and tell someone when I expect to return.
I make sure that my phone is charged, offline maps are available when appropriate, and emergency contacts or relevant local numbers are accessible. For trips where mobile coverage is unreliable, I consider whether a satellite communicator or personal locator beacon is warranted. I also check that my shoes, backpack, and other essential equipment are in good condition, since the best emergency kit cannot compensate for avoidable problems with basic gear.
Finally, I remind myself that preparation is about making sensible decisions, not carrying an answer to every possible disaster. If the weather deteriorates, a route becomes unsafe, or the group is struggling, turning back may be the smartest choice. A well-prepared outdoor enthusiast knows when to use the equipment they brought and when to avoid taking a risk in the first place.
Build Gradually, Prepare Thoughtfully, and Get Outside
A dependable outdoor survival kit does not have to be expensive or impressive to be effective. The goal is to carry a practical set of supplies that addresses the most important risks in your environment, with each item serving a clear purpose. Water, first aid, weather protection, lighting, navigation, food, and emergency communication form a useful foundation for many outdoor activities, although the exact contents should change with the trip.
I would start with the equipment already available at home, identify the most serious gaps, and buy reliable essentials one category at a time. From there, I would test the kit, learn how to use its contents, and improve it based on real experience rather than advertising. That approach keeps spending under control while building confidence in the gear you carry.
The perfect outdoor survival kit on a budget is not the one with the most gadgets or the highest price tag. It is the one you understand, maintain, and can use when an ordinary adventure takes an unexpected turn. Spend carefully, practice regularly, and give yourself the best chance of handling challenges calmly so that you can focus on what brought you outdoors in the first place: the freedom, discovery, and satisfaction of being outside.